Dicom Sender Software
You can use MIPAV to query a DICOM-compatible archive or an imaging device that has, or is connected to, a DICOM server. A DICOM server is an application that processes DICOM query and retrieve requests.
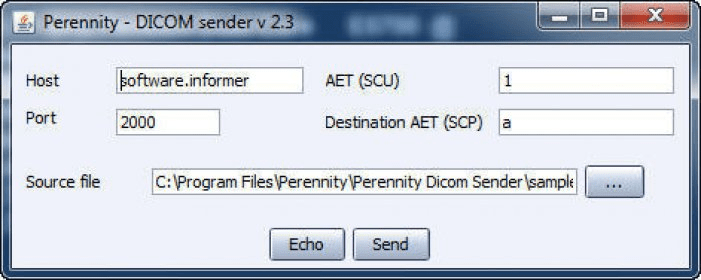
A utility for sending DICOM image files to PACS (or any DICOM send destination). It's really just a GUI front end for STORESCU.EXE from the OFFIS DCM Toolkit. DicomSend recursively searches a folder of your choice and tries to send anything it finds.
Because MIPAV is not equipped with a server, you cannot use this process to obtain DICOM files from another researcher who is also using MIPAV. You must use the receive process outlined in 'Receiving and sending image files' instead. You can then select images from the query results and store them on your hard drive or another destination. The tasks involved in sending and retrieving DICOM images include the following: • • • •. Contents • • • • • DICOM Communication Panel dialog box To set up the hosts table and to query, retrieve, receive, and send DICOM files, you use the DICOM Communication Panel dialog box. To view this dialog box, select File > DICOM Database Access in the MIPAV window. The DICOM Communication Panel dialog box opens.
This dialog box includes four tabbed pages: • QR Client, which appears by default when the dialog box is first opened. Use this page to search for an image for a particular patient, physician, and time period. • Send, which allows you to select the files to be sent to the DICOM imaging device, to select the specific imaging device from a list of available devices to which you want to send the files, and to send the files. This page also allows you to test the connection to the device that you selected. • Hosts, which allows you to create a servers to which you are connected, edit the settings for servers, delete servers, and set the default server.
It also allows you to create, edit, or delete storage destinations and set the default storage destination. • Help, which provides instructions for setting up the hosts table and for sending and receiving images.
The following sections discuss these pages and explain in detail the contents of each page and how to use them. Setting up the hosts table Before creating queries or receiving and sending images, you must set up the hosts table, which is on the Hosts page (Figure 7) in the DICOM Communication Panel dialog box.
 Free books author Charu Nivedita online. Free library of e-books download read On our site we have the best collection of books, descriptions, reviews of the books and their authors. Charu Nivedita Books. Labels: books by charu nivedita, charu nivedita, charu nivedita books, charu nivedita novels, charu nivedita tamil books. Books by Charu Nivedita, Kaṭavuḷum nān̲um, Āsāti-- āsāti-- āsāti--, Matumitā con̲n̲a pāmpu kataikaḷ, Kāmarūpa kataikaḷ, Ticai ar̲iyum par̲avaikaḷ, Cin̲imā cin̲imā, Tīrākkātali, Tirakkatali. CHARU NIVEDITA BOOKS PDF - HOME BIOGRAPHY BOOKS ARTICLES GALLERY CONTACT. Simple pdf download website without any modern techniques.
The hosts table stores information (application entity [AE] title, alias, IP address, and port number) about the devices to which you want to connect. Conversely, your computer's connection information must be stored in the hosts table of the devices to which you want to connect. Note that the title bar for the DICOM Communication Panel dialog box contains the internet protocol (IP) address for your workstation.
• • Motherboard: • ASUS ROG Maximus X Hero • CPU: • Intel Core i7 8700K 5.2Ghz @Corsair H115i • RAM: • Gskill Ripjaws V 3600MHz 2x8GB • Hard Drive: • Zotac SSD 480GB Premium + Seagate Barracuda 2TB • Graphics Card: • Zotac GTX 1080Ti Amp! Serial number rups 2000 1.
Internet protocol (IP) address: A numeric ID that is used to identify your computer on a Transmission Control Protocol/Internet Protocol (TCP/IP) network. An example of a TCP/IP network is the Internet. To display the Hosts page, select the Hosts tab in the dialog box.
The Hosts page, shown in Figure 7, appears. The Servers panel on the Hosts page includes fields that contain identifying information for the devices to which you want to connect. (Although the panel is named Server, you should create an entry for any type of device to which you want to connect.) The Storage Destination panel holds entries that indicate where you want images to stored once you retrieve or receive them. The following sections explain how to: Create, edit, or delete entries in the Servers panel. Connecting to a DICOM device Connecting to a DICOM device Before you begin, obtain the AE title, alias, IP address, and port number of the device to which you want to connect. The connection information for the NIH Kodak Cemax-Icon PACS appears when you click the Help tab. The Help page appears (Figure 8]).
You must also contact the administrator of the device (including the NIH Kodak Cemax-Icon PACS) so that your connection information can be stored in their hosts table as well. Once you have all of the information, you can create an entry in the hosts table entry. Contact Alberto Goldszal, CC, 6-7700 ext.226 to have your machine properly added to the server host table. You will need your IP address which can be found on the title bar of this frame. The Edit Server dialog box To delete servers 1 Select the server in the Servers panel that you want to delete.